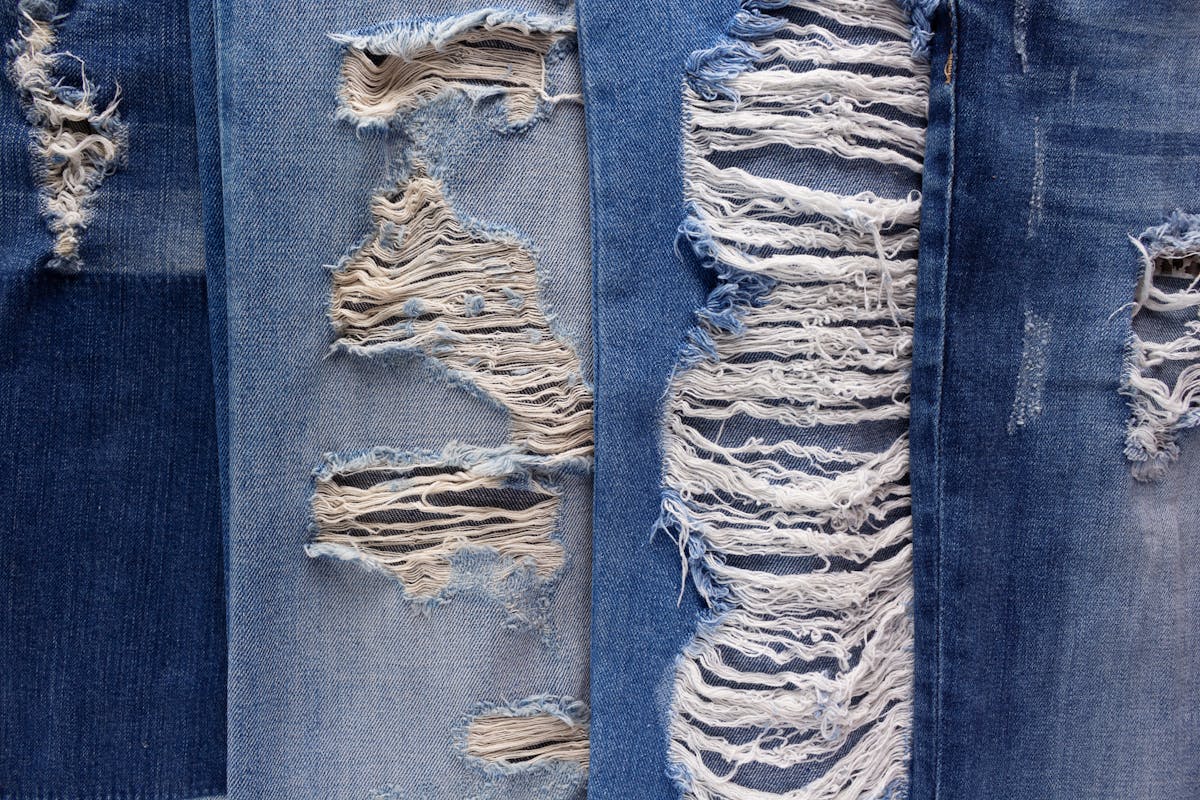
Ripped jeans have become a popular fashion trend, adding a touch of effortless cool to any outfit. Instead of spending a fortune on a new pair of ripped jeans, why not create your own? With a bit of patience and some basic materials, you can transform a plain pair of jeans into a trendy fashion statement. In this step-by-step guide, we will walk you through the process of making ripped jeans, from understanding the basics to advanced ripping techniques. So, grab your jeans and let's get started!

Understanding the Basics of Ripped Jeans
Before diving into the ripping process, it's important to understand the history and different styles of ripped jeans. Knowing the origin of this trend can help you appreciate its significance and inspire your own unique design choices.
The History of Ripped Jeans
Ripped jeans first gained popularity in the 1980s, when punk and grunge cultures embraced the rebellious and DIY aesthetic. What started as a fashion statement for countercultural movements soon became a mainstream trend. Today, ripped jeans are worn by people of all ages and styles, adding an edgy touch to various outfits.
The history of ripped jeans can be traced back to the punk movement of the 1970s. Punk rockers, known for their anti-establishment attitude, began ripping their jeans as a form of self-expression and rebellion against societal norms. The torn fabric symbolized their rejection of mainstream fashion and their desire to create a unique identity.
As the punk movement gained momentum, ripped jeans became a symbol of nonconformity and individuality. The trend quickly spread to other subcultures, such as the grunge scene in the 1990s. Bands like Nirvana and Pearl Jam popularized the ripped jeans look, making it a staple in alternative fashion.
Over the years, ripped jeans have evolved from a symbol of rebellion to a fashion statement. Designers began incorporating distressed details into their collections, offering a more polished version of the ripped jeans look. Today, ripped jeans can be found in high-end fashion stores, as well as fast fashion retailers, catering to a wide range of style preferences.
Different Styles of Ripped Jeans
Ripped jeans come in various styles, ranging from subtle distressed details to bold and heavily torn designs. Some popular styles include knee rips, thigh rips, and distressed patches. Understanding these different styles will help you decide which look you want to achieve and guide you through the ripping process.
Knee rips are one of the most common styles of ripped jeans. They feature tears or holes around the knee area, adding a casual and worn-in vibe to the jeans. Knee rips can be small and subtle, or larger and more pronounced, depending on the desired look.
Thigh rips, on the other hand, are a bolder style choice. These rips are typically larger and extend from the knee up to the upper thigh. Thigh rips add a more dramatic and edgy touch to the jeans, making them a popular choice among those who want to make a statement with their outfit.
Distressed patches are another style option for ripped jeans. Instead of having tears or holes, these jeans feature patches of distressed fabric. These patches can be strategically placed on the jeans to create a unique and artistic look. Distressed patches offer a more controlled and intentional approach to the ripped jeans trend.
When deciding on the style of ripped jeans you want to create, it's important to consider your personal style and the occasion you'll be wearing them for. Subtle knee rips may be more appropriate for a casual day out, while bold thigh rips can add an extra edge to a night out with friends.
Experimenting with different styles of ripped jeans allows you to express your individuality and create a look that is uniquely yours. Whether you prefer a more understated distressed look or a bold and heavily torn design, ripped jeans offer endless possibilities for self-expression and style.

Gathering Your Materials
Before you start ripping your jeans, gather all the necessary materials to ensure a smooth and successful process.
When it comes to transforming your jeans into a trendy ripped style, it's important to choose the right pair of jeans. You'll want to select a sturdy pair that you're willing to transform, as this process will alter the fabric. Look for jeans that fit well and are made of durable denim fabric. The type of denim can affect the ease of ripping and the overall look, so keep this in mind when making your selection.
Once you have your jeans ready, it's time to gather the essential tools for ripping them effectively. These tools will help you create clean cuts, distress the edges, and remove excess threads for a professional finish. One of the most essential tools you'll need is a pair of sharp scissors. These will allow you to make precise cuts and control the size and shape of the rips. Additionally, tweezers are handy for pulling out individual threads and creating a more distressed look.
Another useful tool to have is sandpaper. This can be used to roughen up the edges of the rips, giving them a more natural and worn-in appearance. By gently rubbing the sandpaper along the edges, you can create a subtle frayed effect that adds to the overall aesthetic of the jeans. Lastly, a seam ripper is essential for removing excess threads and tidying up any loose ends. This will ensure that your ripped jeans look neat and well-crafted.

Preparing Your Jeans for Ripping
Before you start the ripping process, it's crucial to prepare your jeans properly. This step will ensure that your jeans rip in the desired areas and prevent any unintentional damage.
Ripping jeans has become a popular trend recently, adding a touch of edginess and personality to your outfit. Whether you want to achieve a distressed look or simply want to breathe new life into your old pair of jeans, following the right preparation steps is essential.
Marking the Areas to Rip
Using a fabric pencil or chalk, mark the areas where you would like to create the rips. This step allows you to have more control over the outcome and helps you visualize the final look. You can start with a few small cuts and gradually increase the size and number of ripped areas. Remember to consider the placement and symmetry of the rips if you want to achieve a balanced look.
When choosing the areas to rip, think about the natural wear and tear that occurs over time. Common areas to focus on include the knees, thighs, and pockets. However, you can get creative and experiment with different placements to make your jeans truly unique.
Protecting the Areas You Don't Want to Rip
To protect the areas you would rather not rip, slide a piece of cardboard or an old magazine into the legs of the jeans. This will act as a barrier, preventing the cuts from accidentally extending to unwanted areas.
It's important to be cautious when ripping your jeans, as you would rather not ruin them completely. By using a protective barrier, you can have peace of mind knowing that the cuts will only occur where you intend them to.
Additionally, consider the thickness of the barrier you use. Thicker materials, such as cardboard, provide better protection against accidental tears. However, make sure the barrier is not too thick, as it may affect the ease of ripping and the overall look of the jeans.
Once you have marked the areas and protected the rest of the jeans, you are ready to move on to the next step in the process. Remember, taking the time to prepare your jeans properly will result in a more controlled and satisfying ripping experience.

The Ripping Process
Now that you've prepared your jeans, it's time to start ripping them. Follow these step-by-step instructions to achieve the ripped look you desire.
Before we dive into the ripping process, let's take a moment to appreciate the history and evolution of ripped jeans. This fashion trend originated in the 1970s as a symbol of rebellion and counterculture. What started as a DIY punk statement has now become a mainstream fashion staple, embraced by people of all ages and styles.
Creating the Initial Cuts
Using sharp scissors, carefully make small cuts along the marked areas. Start with shorter cuts, and gradually increase the length to achieve the desired ripped effect. It's important to consider the placement of the cuts. Think about how you want the rips to look on your jeans. Do you want them concentrated around the knees, or scattered throughout the fabric? The choice is yours!
As you make the cuts, you might wonder how much is too much. Remember, it's always better to start with fewer cuts and add more later if needed. It's easier to increase the level of distressing than to repair an overly ripped pair of jeans.
Fraying the Edges
After making the cuts, use tweezers to gently pull out threads from the edges of the cuts. This will create a frayed and worn-out look, adding authenticity to the ripped areas. Take your time with this step, as it can be a bit tedious. However, the result will be worth it.
While fraying the edges, you might come across different colored threads. This variation in thread color adds an interesting visual element to the overall distressed look. Embrace these subtle details as they contribute to the uniqueness of your ripped jeans.
Washing and Drying for a Natural Look
To enhance the ripped effect and create a more natural look, wash and dry your jeans. This step is crucial as it further distresses the ripped areas, giving them a worn-in appearance. The washing process will soften the fabric and loosen the threads, making the rips look more organic.
When washing your jeans, consider using a gentle cycle and cold water to preserve the color and quality of the fabric. Avoid using bleach or harsh detergents as they can cause damage. Additionally, turning your jeans inside out before washing can help protect the outer surface.
Once washed, it's time to dry your jeans. You have two options here – air drying or using a dryer. Air drying is a more gentle approach, allowing the fabric to naturally settle and the rips to develop further. On the other hand, using a dryer can speed up the process and create a more pronounced distressed look.
Before you put on your newly ripped jeans, take a moment to appreciate the artistry behind this fashion statement. Each rip and fray tells a story, adding character and individuality to your denim. Embrace the imperfections and wear your ripped jeans with confidence!
Advanced Ripping Techniques
If you want to take your ripped jeans to the next level, experiment with advanced ripping techniques. These techniques allow you to add unique elements to your jeans, making them truly one-of-a-kind.
Creating Distressed Patches
In addition to rips, you can create distressed patches on your jeans. This technique involves cutting larger sections of fabric and intentionally fraying the edges. Distressed patches can be placed strategically to add interest and variation to your ripped jeans.
Adding Decorative Elements
If you're feeling adventurous, you can personalize your ripped jeans by adding decorative elements. Consider sewing on patches, studs, sewing labels, or embroidery to give your jeans a personalized touch. Let your creativity shine to make a fashion statement that is uniquely yours.
Now that you know the step-by-step process of making ripped jeans, it's time to unleash your creativity. Whether you're going for a subtle distressed look or a bold statement, remember that practice makes perfect. Experiment with different techniques and styles to find your signature ripped jeans style. With a bit of patience and attention to detail, you'll be sporting your own custom-made ripped jeans in no time. Happy ripping!


